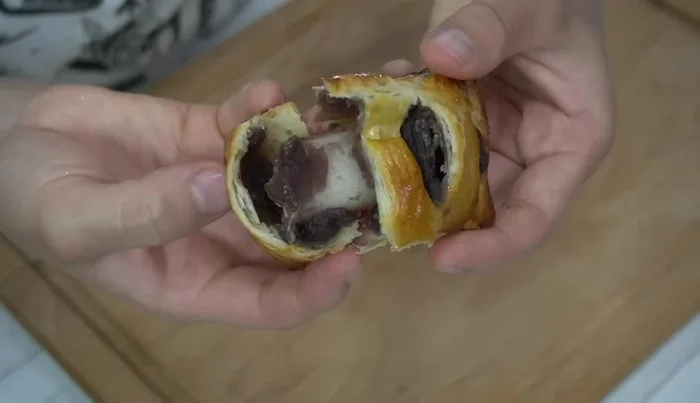
Prepare for a delightful explosion of flavors and textures with this Anko Mochi Pie recipe! This unique dessert masterfully combines the chewy goodness of mochi with the sweet, subtly savory notes of anko (sweet bean paste). Forget everything you thought you knew about pie – this isn't your grandma's apple pie. Imagine a delicate, subtly sweet crust cradling a warm, pillowy mochi filling generously studded with rich anko. The contrasting textures and tastes create an unforgettable experience that's both comforting and sophisticated.
This recipe simplifies the often-daunting process of making mochi, making it accessible to even beginner bakers. Forget complicated techniques and lengthy preparation times; this recipe focuses on achieving maximum flavor and delightful texture with minimal fuss. Ready to embark on this culinary adventure? Let's dive into the step-by-step instructions to create your own delicious Anko Mochi Pie.
Tools Needed
- Oven
- Cutting board
- Knife
- Fork
- Mixing bowl
Ingredients
- Frozen pie dough
- Mochi rice cake
- Egg yolk
- Water
- Sweet bean paste (anko)
Step-by-Step Instructions
Step 1. Prepare the Filling and Dough
- Cut the mochi into 4 equal parts. Cut it in half lengthwise, then rotate and cut in half again.
- Spread flour on a cutting board and roll out the frozen pie dough to about half its thickness (approx. 20cm x 15cm).
- Cut the pie dough into 4 equal parts.


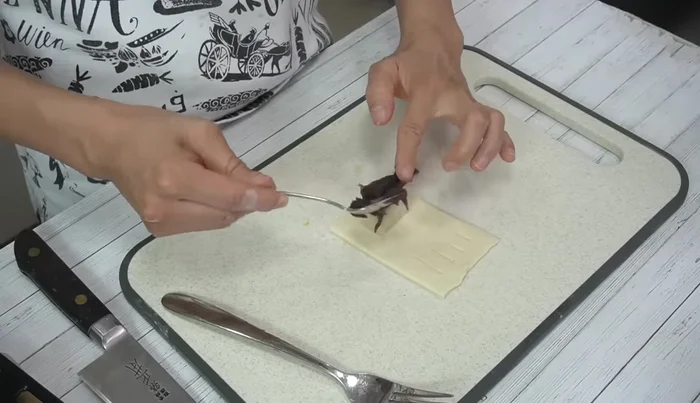
Step 2. Assemble and Seal the Pies
- Place a piece of mochi on one half of a pie dough piece, top with sweet bean paste (approx. 15g).
- Fold the pie dough over the filling, make a few cuts on the edges, and press the edges together with a fork.
- Repeat steps 5 and 6 for the remaining pie dough and mochi.

Step 3. Bake to Perfection
- mix egg yolk and a little water.
- Brush the surface of the pies with the egg mixture.
- Bake in a preheated oven at 200° for 15-20 minutes, or until golden brown.


Step 4. Cool and Serve
- Let cool and enjoy!
Read more: Chikuwa Isobeage Recipe: Crispy Fish Cake Tempura
Tips
- If using round mochi, adjust cutting accordingly.
- Be careful when cutting the mochi, as it’s hard.
- Use strong flour if possible for rolling out the pie dough. If not, weak flour works too.
- Let the frozen pie dough sit at room temperature for 10-15 minutes before rolling to make it easier to work with.
- Monitor the baking process to adjust baking time as needed.
- Reheat slightly in a toaster oven if desired after cooling to restore softness.
Nutrition
- Calories: varies significantly
- Fat: varies significantlyg
- Carbs: varies significantlyg
- Protein: varies significantlyg
FAQs
1. Can I use store-bought mochi for this recipe?
Yes, using store-bought mochi significantly simplifies the process. Just ensure it's the soft, pliable kind, not the hard, dried variety.
2. What if I don't have sweet bean paste (anko)?
While anko is traditional and highly recommended, you can substitute with other sweet fillings like red bean jam, Nutella, or even a simple custard cream. The mochi will still be delicious!
This Anko Mochi Pie recipe offers a delightful twist on traditional desserts, showcasing the beautiful harmony of textures and flavors. Enjoy the rewarding experience of creating this unique treat, and savor every bite of its chewy, sweet perfection. Share this recipe with friends and family, and spread the joy of this easy-to-make, yet impressive dessert.