Craving a quick and easy, yet incredibly flavorful, vegan snack or side dish? Look no further than Asuka Pickles! This vibrant Japanese pickle recipe is surprisingly simple to make, requiring minimal ingredients and even less time. Perfect for beginners and seasoned cooks alike, Asuka Pickles offer a delightful balance of sweet, sour, and salty notes that will tantalize your taste buds. The crunchy texture and bright, refreshing taste make them a fantastic addition to any meal, from rice bowls to bento boxes. They're also incredibly versatile, allowing you to adjust the seasonings to your personal preference.
Forget complicated pickling processes! This recipe streamlines the traditional method, offering a fast and efficient way to enjoy these delicious pickles without the wait. Using readily available ingredients, you can have a jar of these delightful Asuka Pickles ready in no time. Ready to dive into the simple, step-by-step instructions and create your own batch of these addictive pickles? Let's get started!
Tools Needed
- Bowls
- Knife
- Cutting board
- Wrap
Ingredients
- Water: 300g
- Salt (sea salt preferred): 9g
- Kombu (kelp): 3g
- Cucumber
- Turnip: 1/2
- Cabbage
- Carrot
- Ginger: 10g
- Japanese Ginger (Myoga)
Step-by-Step Instructions
Step 1. Prepare Brine and Vegetables
- Prepare two bowls of saltwater (300g water, 9g salt each). Add 3g of kombu to one bowl and let it sit to extract flavor.
- Cut the cucumber into same-width slices. Slice the Japanese ginger diagonally. Peel and slice the turnip. Remove the core of the cabbage and cut the leaves into small squares. Peel and cut the carrot into thin rectangular slices. Peel and thinly slice the ginger.
Step 2. Initial Salting and Soaking
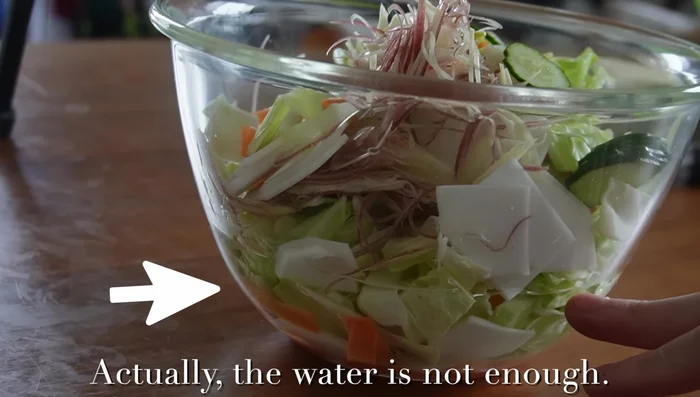
- Add all prepared vegetables to one of the saltwater bowls. Ensure they are fully submerged; use pressure to submerge if needed. Let it sit for 15 minutes at room temperature.
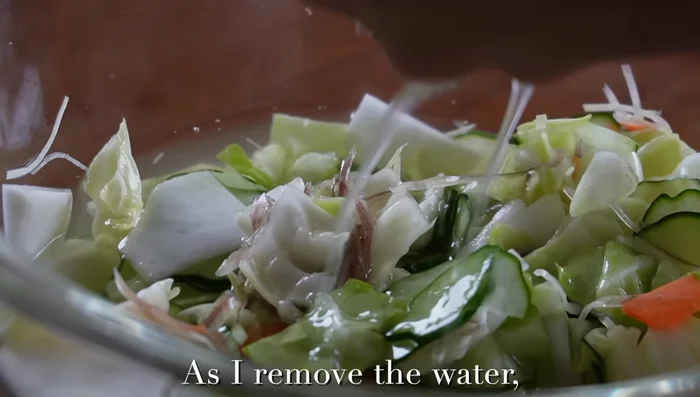
- Squeeze out excess water from the vegetables. This step is crucial for the flavor to soak in.
Step 3. Kombu Brine and Refrigeration
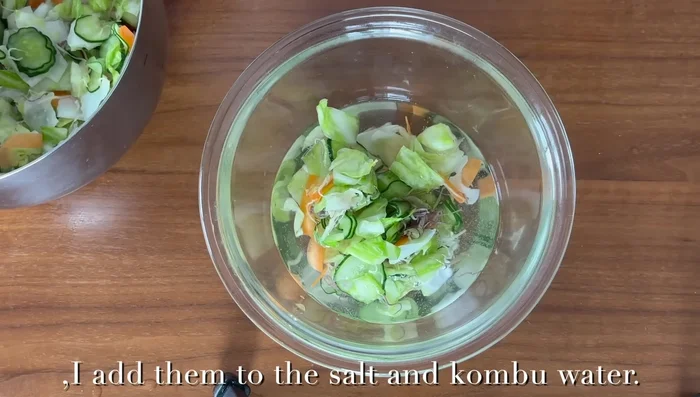
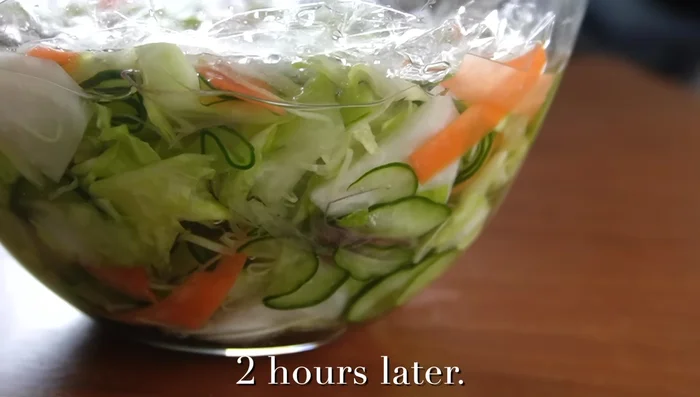
- Add the vegetables to the second bowl of saltwater (with kombu). Press down again. Cover with a wrap and refrigerate for at least 2 hours.
Step 4. Serve and Store
- After 2 hours, the Asuka pickles are ready! They can be stored in the refrigerator for up to 3 days.
- Arrange the pickles on a plate and serve.
Read more: Kinpira Gobo Recipe: A Sweet & Savory Japanese Side Dish
Tips
- The total weight of the vegetables should be around 500g. You can adjust the ratio of vegetables according to your preference.
- The soaking time may vary depending on the temperature. In winter, it might take longer than in summer. Make sure the carrot becomes tender.
- Using high-quality sea salt enhances the flavor.
Nutrition
- N/A
FAQs
1. Can I use different vegetables besides daikon radish and carrots?
Absolutely! Try cucumbers, turnips, or even green beans. Just ensure they're similarly firm and cut to a similar size for even pickling.
2. How long can I store the Asuka Pickles in the refrigerator?
These pickles will keep in the refrigerator for about a week. They'll continue to develop flavor over time, but for optimal crunch, it's best to enjoy them within 5-7 days.
So there you have it – a quick, easy, and incredibly delicious recipe for vegan Asuka Pickles! Enjoy these vibrant pickles as a refreshing snack, a flavorful side dish, or a unique addition to your favorite meals. Now go forth and pickle!