Sea bream, with its delicate flavor and firm texture, is a prized ingredient in sushi. While often seen in sashimi, its potential in nigiri is often overlooked. This article will guide you through mastering the art of crafting exquisite sea bream nigiri, transforming a simple fish into a culinary masterpiece. We’ll explore the nuances of selecting the perfect fillet, focusing on minimizing waste and maximizing the fish's inherent beauty. Proper filleting techniques are crucial, not only for presentation but also for preserving the fish's delicate flavor and moisture.
Understanding the optimal slicing technique is paramount to achieving perfectly balanced nigiri. From preparing the rice to the precise application of wasabi and the final elegant presentation, each step contributes to an unforgettable dining experience. Ready to elevate your sushi skills? Let's dive into the detailed step-by-step process.
Tools Needed
- Sharp knife
- Cutting board
Ingredients
- name: Sea Bream fillet (Tai)
- amount
Step-by-Step Instructions
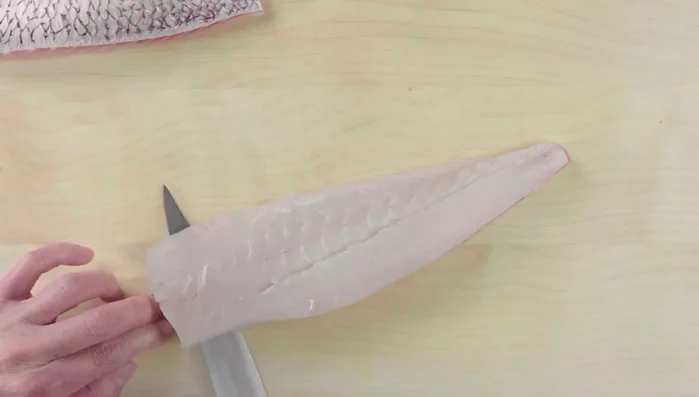
Step 1. Prepare the Fillet
- Remove the skin from the sea bream fillet. (Refer to a filleting technique video for detailed instructions if needed.)
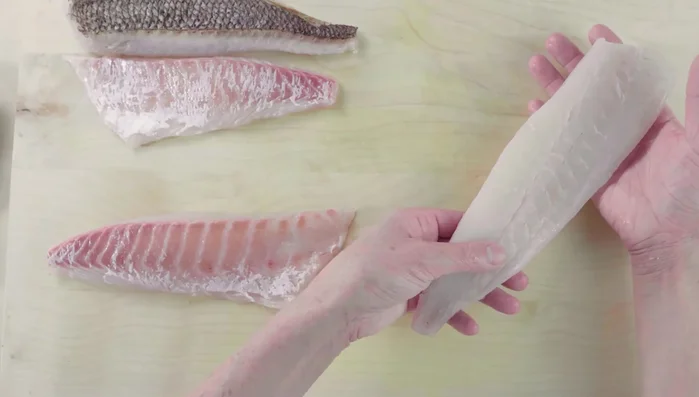
Step 2. Orient and Identify Fillet Sides
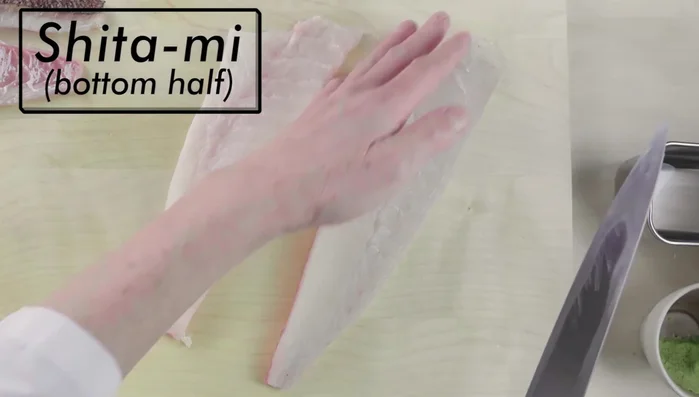
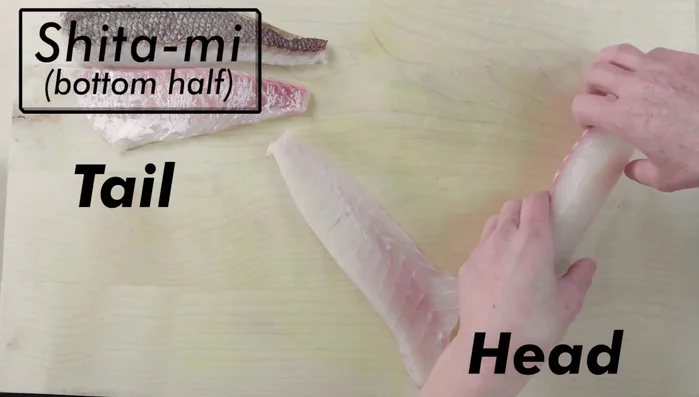
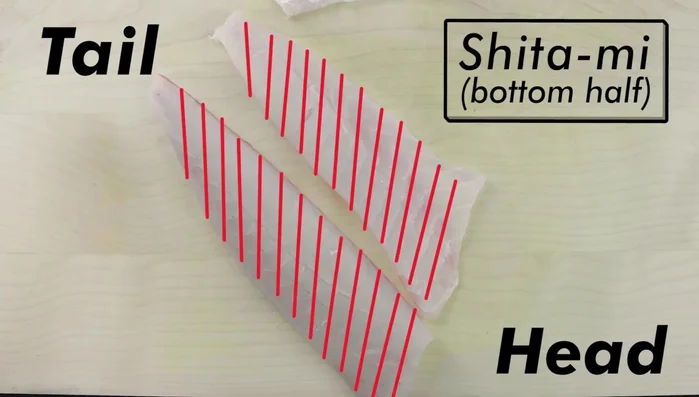
- Identify the 'shitami' (bottom half) and 'uwami' (top half) of the fillet. Place the fillet skin-side down on the cutting board with the tail pointing away from you (left side) and the head towards you (right side).
Step 3. Slice the Shitami (Bottom Half)
- Begin slicing the 'shitami' (bottom half) of the fillet from the tail end, keeping the slices at a consistent thickness appropriate for nigiri. The fish should always be facing skin side down.
- Continue slicing until you reach the end of the 'shitami'. This strategic placement ensures maximal use of the fillet and minimizes waste.
Step 4. Slice the Uwami (Top Half)
- Repeat the process with the 'uwami' (top half), maintaining the same orientation to maximize yield.
Read more: Chef Tom's Tuna Tataki: A Step-by-Step Guide
Tips
- Use a very sharp knife to ensure clean cuts and minimize meat loss.
- Understanding the 'uwami' and 'shitami' concept is crucial for minimizing waste when slicing fish for nigiri.
- The quality of meat differs between 'shitami' and 'uwami', with 'uwami' being fresher. Chefs use the 'shitami' first, reserving the 'uwami' for later.
- Strategic fish placement (tail away, head towards you) is key to avoiding small, unusable pieces.
Nutrition
- N/A
FAQs
1. What type of sea bream is best for nigiri?
Choose a firm, high-quality sea bream with minimal bones. Species like the European sea bream or red sea bream work well.
2. How do I prevent the sea bream from falling apart when slicing?
Ensure your knife is extremely sharp and your fish is very cold. Use a gentle, sawing motion to avoid tearing the delicate flesh.
3. What if I accidentally make a mistake while slicing? Can I still use the piece?
Smaller, less-perfect pieces can be used for other applications, such as in a chirashi bowl or a mixed sushi platter. Don't waste any good fish!
Mastering the art of sea bream nigiri is a rewarding journey that elevates your sushi-making skills. By following these techniques, you can create beautiful, flavorful nigiri with minimal waste, showcasing the best of this elegant fish. Enjoy the delicious results and impress your friends and family with your newfound expertise!