Wabi-sabi, the Japanese aesthetic of finding beauty in imperfection, finds a delicious expression in wabi-mochi. These simple, rustic mochi are a far cry from the perfectly polished versions you might find in a shop. Instead, they celebrate the natural variations in texture and color, embracing a charmingly uneven appearance. Forget complicated techniques and expensive ingredients; wabi-mochi offers a refreshing approach to this beloved Japanese treat, perfect for both beginners and experienced bakers. They're incredibly affordable and surprisingly easy to make, resulting in a delightful dessert that's as pleasing to the eye as it is to the palate.
This recipe for frugal wabi-mochi utilizes readily available ingredients and minimizes fuss, focusing on the inherent goodness of simple flavors. The slightly chewy texture and subtly sweet taste are incredibly satisfying, making them a perfect treat for any occasion. Ready to learn how to create these delightful, imperfect, and utterly delicious mochi at home? Let's dive into the easy step-by-step instructions!
Tools Needed
- Microwave
- 400ml Tupperware
Ingredients
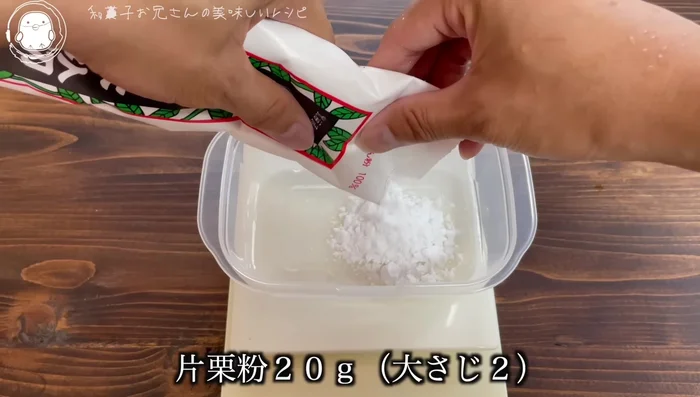
- Potato starch: 20g (2 tablespoons)
- Sugar: 10g (1 tablespoon)
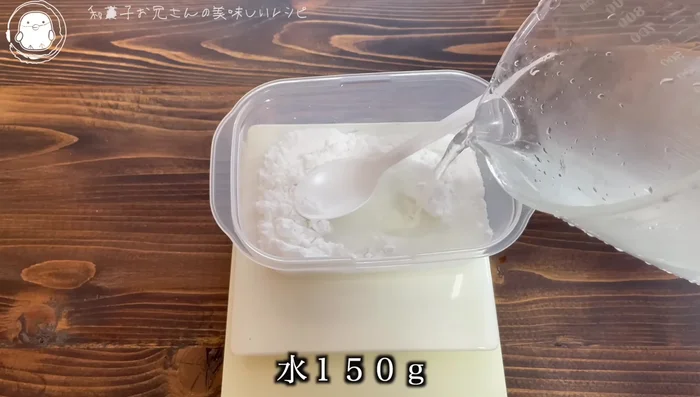
- Water: 150g
Step-by-Step Instructions
Step 1. Prepare the Mochi Base
- Add 20g of potato starch and 10g of sugar to the Tupperware. Rub them together until evenly distributed.
- Add 150g of water and mix until uniform.
Step 2. Microwave and Mix
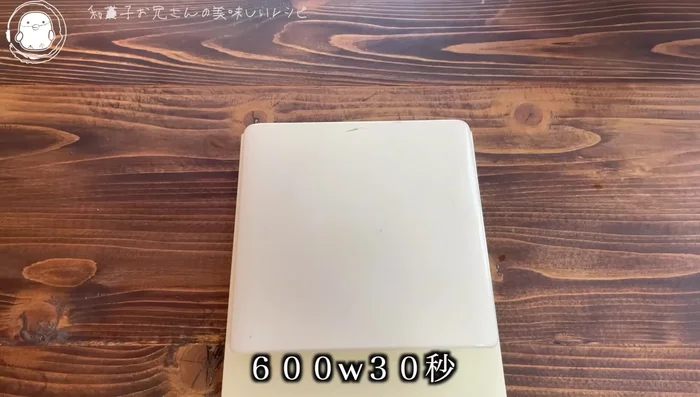
- Microwave at 600W for 30 seconds. Mix well, ensuring the mixture is evenly distributed.
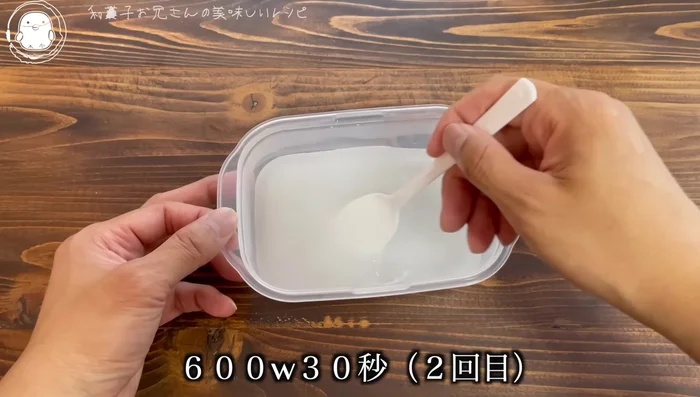
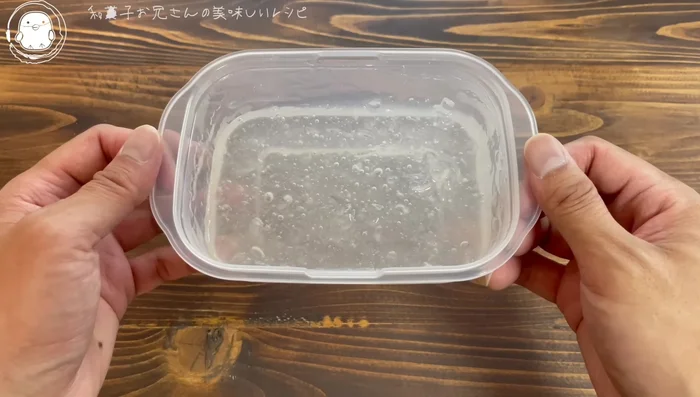
- Microwave again at 600W for 30 seconds. Mix thoroughly. Repeat this process several times until the mixture becomes soft and mushy, and transparent.
Step 3. Shape and Cool
- Once the mixture is smooth and transparent, tap it gently to flatten it.
- Let it cool down at room temperature. Avoid refrigerating as it will harden.

Step 4. Flavor and Serve
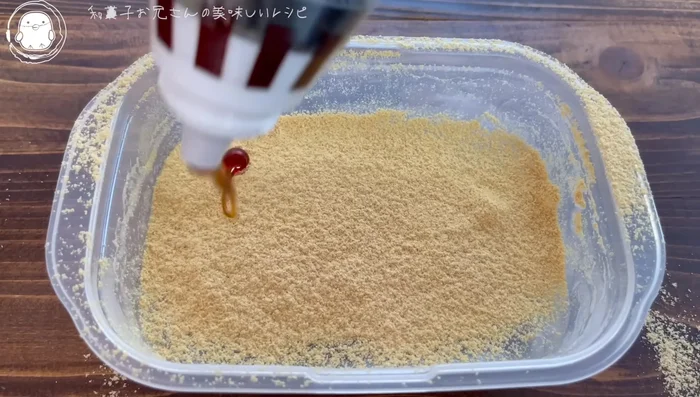
- Once cooled, add kinako (roasted soybean flour) and brown syrup for added flavor (optional).
Read more: Ochazuke Recipe: Easy Japanese Green Tea Rice Bowl
Tips
- Microwave in small increments of 30 seconds at 600W to prevent burning or clumping.
- The best texture is achieved when the wabi mochi is slightly warm, not overly chilled.
Nutrition
- N/A
FAQs
1. Can I substitute the glutinous rice flour?
While glutinous rice flour is ideal for the chewy texture, you can experiment with a blend of all-purpose flour and cornstarch, but the result will be less chewy.
2. How can I store leftover wabi-mochi?
Store leftover wabi-mochi in an airtight container in the refrigerator for up to 3 days. They can also be frozen for longer storage.
Making wabi-mochi is a rewarding experience, proving that delicious treats don't have to be complicated or expensive. Embrace the imperfections, enjoy the simple process, and savor the delightful results of your homemade wabi-mochi. Now go forth and create your own imperfectly perfect batch!