Master the art of Japanese rolled omelette, or tamagoyaki, with this comprehensive step-by-step guide. This seemingly simple dish requires precision and patience to achieve its signature silky texture and visually stunning layered appearance. From preparing the egg mixture to the delicate rolling technique, each step is crucial in creating a perfect tamagoyaki that rivals those found in top restaurants.This guide will walk you through every detail, ensuring you achieve a restaurant-quality result at home. Learn how to gently whisk eggs to avoid air bubbles, strain the mixture for a flawlessly smooth texture, and master the art of layering in a lightly oiled pan at low heat. Discover the secret to achieving those perfectly defined swirls and consistent height, resulting in a visually appealing and delicious rolled omelette perfect for sushi, bento boxes, or as a delightful side dish. Prepare to elevate your culinary skills with this timeless Japanese classic.
Pros And Cons
- Rectangular shape achieved using a square pan.
- Silky, even texture due to straining egg mixture.
- Even pale yellow color.
- Can be cut into slices for sushi.
Read more: Top 7 Cast Iron Tamagoyaki Pans: Our Best Picks
Preparing the Egg Mixture
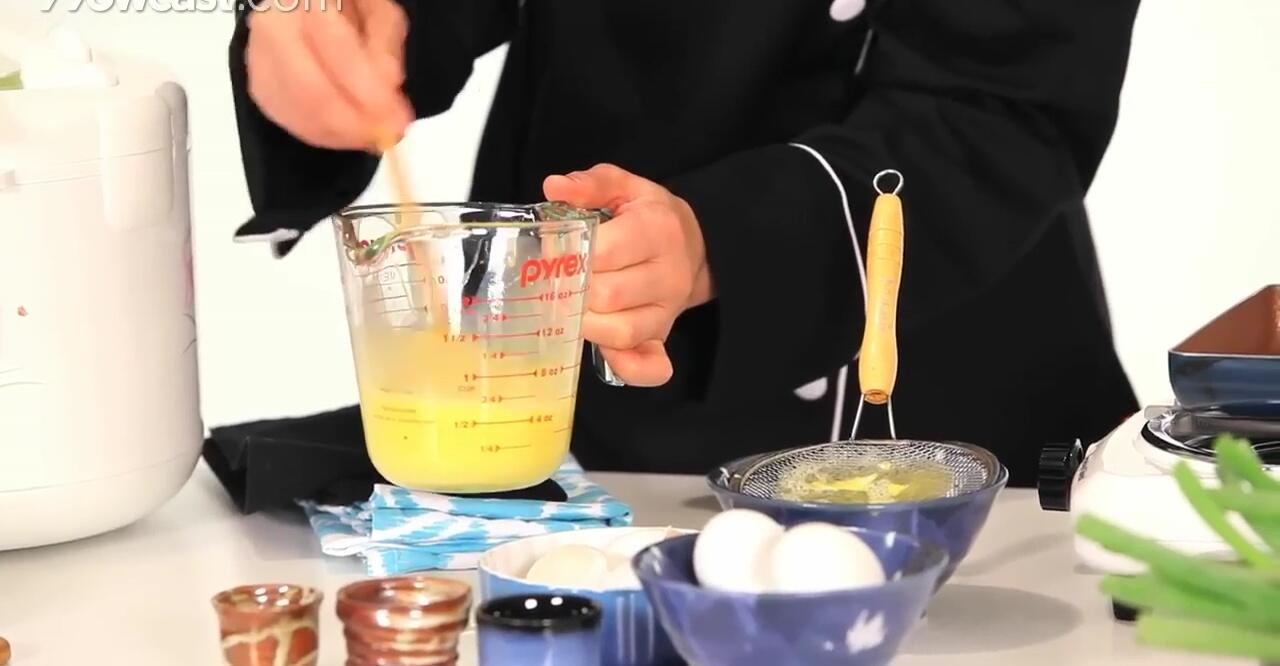
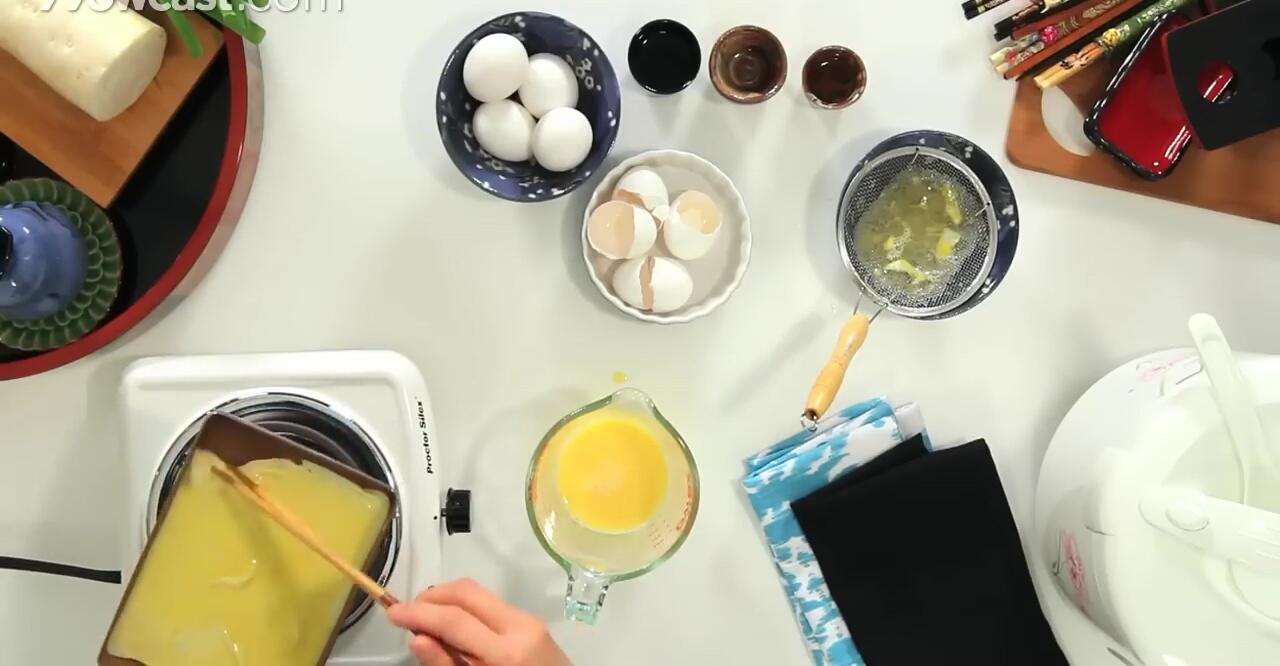
The key to a perfect tamagoyaki lies in the preparation of the egg mixture. Begin by gently breaking four eggs into a bowl, taking care not to incorporate air bubbles. Vigorous whisking is discouraged; instead, focus on breaking the yolks without creating excessive foam. This ensures a smooth, silky texture in the final product.
Next, strain the mixture through a fine-mesh sieve to remove any lingering egg membranes or bits of shell. This extra step significantly contributes to the refined, even texture of the tamagoyaki. The result will be a beautifully consistent yellow color, free from any unsightly white specks.
Cooking the Tamagoyaki
Use a rectangular tamagoyaki pan, lightly oiled with cooking spray (avoiding over-spraying!). Pour a thin layer of the egg mixture into the heated pan. Allow it to cook until the edges begin to set, then gently roll the cooked portion towards one side of the pan.
Continue this process, adding more egg mixture and rolling each layer onto the previous one. Keep the heat low to prevent burning and to ensure even cooking throughout. The layering creates the characteristic visually appealing swirls within the finished product.
Finishing and Serving
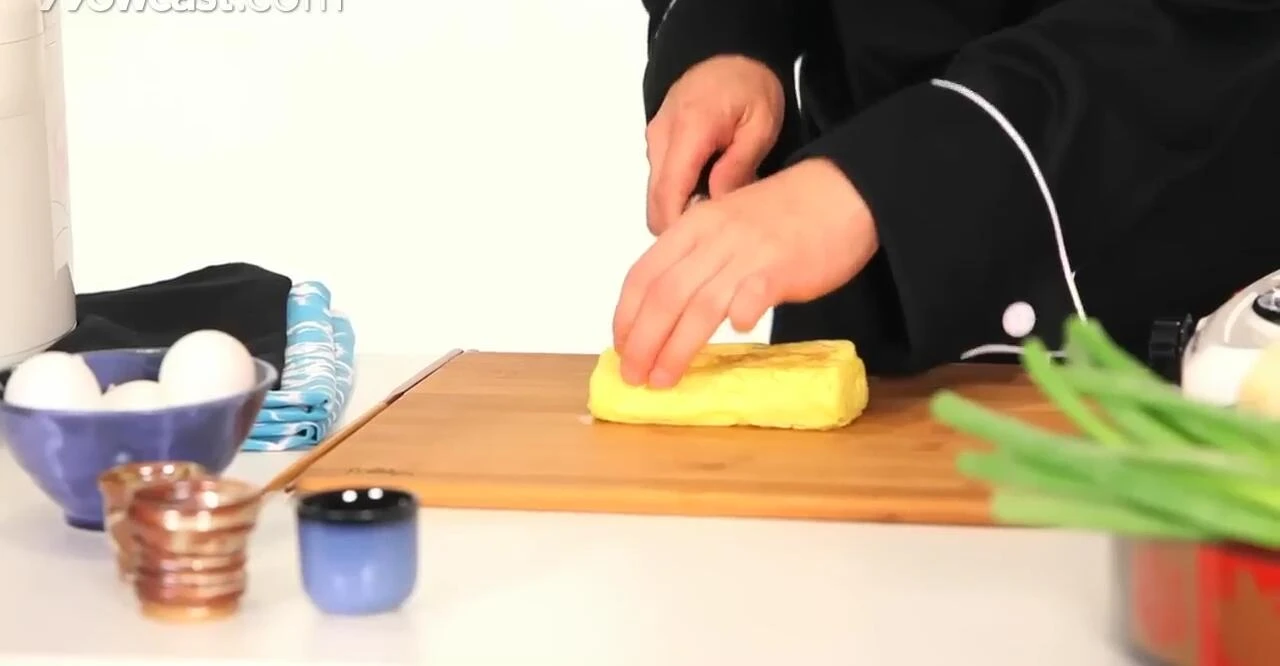
Once the entire egg mixture has been cooked and rolled into a neat rectangular shape, remove it from the pan and let it cool slightly. The height of the tamagoyaki should match the height of the pan for optimal visual appeal and consistency.

Finally, slice the tamagoyaki into bite-sized pieces. The rolling technique creates beautiful, distinct layers that are clearly visible when sliced. This makes it perfect for sushi rolls or as a stand-alone side dish, adding an elegant touch to any meal.
Conclusion
Making tamagoyaki might seem daunting, but with patience and attention to detail, anyone can achieve a restaurant-quality result. The key is gentle egg handling, careful layering, and maintaining a low heat to prevent burning. This traditional Japanese rolled omelette is a visually stunning and delicious addition to any meal, whether enjoyed as a sushi component or savored independently.